Making dip wash for miniatures and terrain

Using washes on miniatures is a great way to add some quick shading to the deepest recesses of a model. There are two ways of applying it:
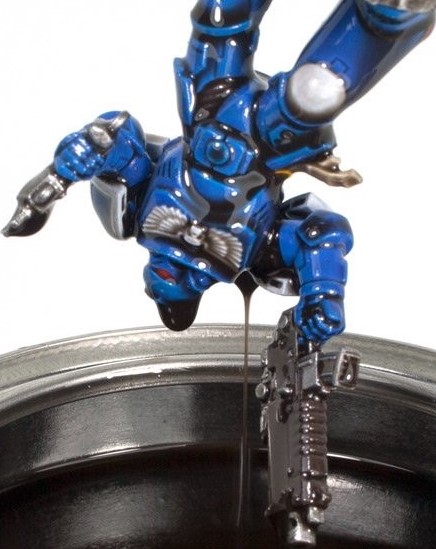
Brushing it on the model(s) using a big paintbrush or dipping smaller models directly into the container holding the wash and tapping off the excess.
After getting inspired by some content creators on social media I set about making my own dip wash, and you know what? It's actually not that hard, bit messy though ...

Start with gathering all the materials you'll need for making the wash:
- Acrylic ink
- Acrylic paint medium
- PVA glue
- Water (straight from the tap or bottled)
- Measuring cup
- Container with a lid (to mix and store the wash in)
- Some wooden sticks to stir and scrape with
- Plenty of paper towels (in case you spill)
- Dish washing soap

Begin with measuring an amount (any amount you wish, depends on how much of the stuff you want to make) of acrylic ink. Remember this amount (about 75ml in my case), because this will be equal to 1 PART. All the other ingredients will be measured in parts, so one part is equal to the amount of ink you started with.
Remember to pick the right color ink for what you want the wash to be. I want a dark brown wash so I'm using "Burned Umber" ink.
Pour this 1 part of acrylic ink into the container with a lid.

Next is 1 part of acrylic painting medium to help improve the flow of the wash and prevent it from staining and creating tide marks as the dip wash dries on your model(s). Pour this into the container with the ink.
It doesn't matter if there's still some residue from the ink in the measuring cup.

Now add 1 part of PVA glue. This has a similar effect as the medium we added earlier, but as a big bonus it also toughens the entire model as it dries. Thus making it extra sturdy and able to withstand nudges and scratches during games.
As this is glue that wooding stick is needed now to scrape it out of the measuring cup.

Now add 8 parts of water (remember that 1 part is equal to the amount of ink we started with). If you see that the mix in the container is still a bit to dark you can add an extra part of water, but no more than that or the wash will be to diluted.

Finally add a few drops (drops NOT parts!!!) of dish soap to the mix. This will help to break the tension of the water we added, helping the dip wash to better run into the deepest recesses of a miniature. Remember that less is more in this case and you can always add a tiny drop of soap if you notice that the wash isn't flowing well enough.

Screw on the lid (tightly!) and mix it very well by shaking it for a minute or two.

The dip wash is ready for use when all of the bubbles are gone.
Before dipping a model or brushing it on just give it a little stir with one of those wooden sticks.

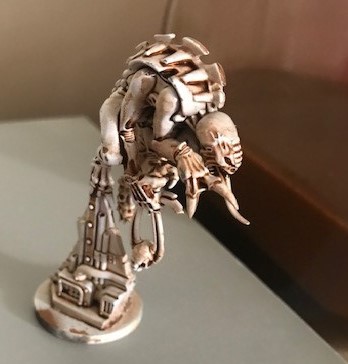
I undercoated a model white and dipped it straight into the liquid and tapped of the excess wash that was pooling in some of the deepest recesses.

This is the result after letting it dry for a couple of hours. A nice shade in the recesses and little staining on the raised parts of the model.
I actually am really pleased with this dip wash, if I would like the model to be darker I would just need to brush on an extra coat or dip it again. This will still leave the raised parts hardly shaded or stained.
This was a fun, fast and really useful little hobby project that also saves me some money on buying washes.